
| » Forum Index » General comments » Topic: An in-depth review of the wonderful Topaz de-noiser module plugin |
|
Posted on 25/10/08 3:06:55 PM |
|
michael sinclair
Off-Topic Opportunist Posts: 1871 Reply |
An in-depth review of the wonderful Topaz de-noiser module plugin
My thanks to Paul 2007 thru 2010 for providing me with a heaven-sent opportunity to to clean up noise on my RAW images, although presets are available for other file types such as jpg and RAW combinations. First things first though: 1. In the comparisons (photos), I have quite intentionally not used CS3's own De-noiser. The reason is simple: it's bloody useless! 2.. with the exception of the first shot ( reduced to 1024 x 768 ), the remaining eight shots have been cropped at 300%. Obviously the resolution is not going to be as sharp or clear as one at 100%; however, the purpose here was to show clearly the differences. 3. The Camera used is the new 15 megapixel Canon50D with the Sigma 18 x 200 superzoom OS. 4. The focal length was 28mm, and the aperture setting f8 with a shutterspeed of 500th of a second. The iso setting was 200. 5. Only the central AF point operated on this occasion and ,therefore, the centre of focus was the Japanese maple. 6. The sequence of shots There are two 4-image sets (at cropped 300%) showing comparisons between A. untouched RAW, B. Unsharp mask (100% sharpness) applied only, C. Using the stand-alone Topaz de-noiser only, and finally, D. The Unsharp Mask (50%) applied after the Topaz de-noiser had been used. 7. It is interesting to note that though I have my camera sharpening set to maximum which is 7, I get a soft resolution when the RAW image is processed by the Adobe RAW convereter before it's placed directly into Photoshop. 8. To notice the difference between comparisons, you must either click on the image or the link provided and fully expand the new window. The first shot (reduced to 1024 x 768 file size) Link for bigger: http://i42.photobucket.com/albums/e341/sinclair97/Original1-1.jpg 
The second shot ( first set) untouched is cropped at 300% Link for bigger: http://i42.photobucket.com/albums/e341/sinclair97/Cropped300untouched2.jpg 
The third shot ( first set) has CS3's Unsharp mask applied only (100% sharpening). Notice the artifacts in the sky and the coarse detail on the roof. There is considerable "speckling" which will be much more noticable on the second set comparisons. Link for bigger: http://i42.photobucket.com/albums/e341/sinclair97/Cropped300Unsharpmask3.jpg 
The fourth shot ( first set) has only the Topaz stand-alone De-noiser module applied. This image is cleaner smoother whithout loss of detail; moreover, the crude artifact appearance has aslo gone. Link for bigger: http://i42.photobucket.com/albums/e341/sinclair97/cropped300Topazde-noiser4.jpg 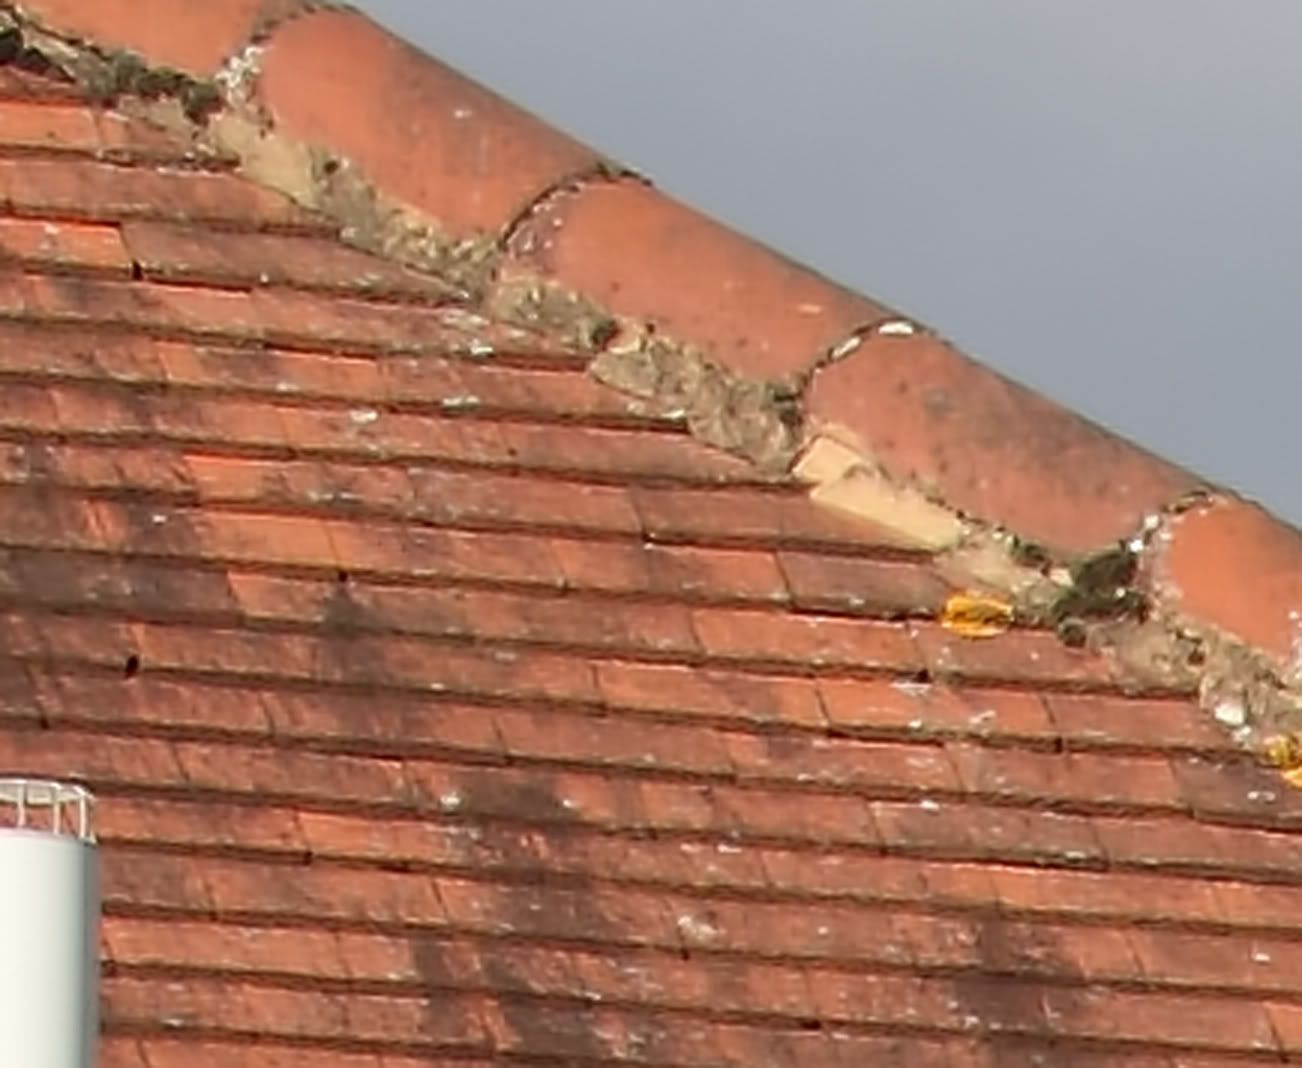
The fifth shot (First set) has the Unsharp Mask (50%) applied only after theTopaz de-noiser application. The purpose of this shot is to illustrate the absence of artifacts and speckles when additonal sharpening is subsequently introduced. Link for bigger: http://i42.photobucket.com/albums/e341/sinclair97/Cropped300Topazde-noisermoduleplusu.jpg 
Second set comparisons Exactly the same sequence procedure has been used (again at cropped 300%), but showing a different portion of the picture so as to show the black speckles more vividly. The sixth shot is untouched: Link for bigger: http://i42.photobucket.com/albums/e341/sinclair97/Cropped300untouched6.jpg 
The seventh shot has again the Unsharp Mask ( 100% sharpening) applied to it. Now you can see the unsightly black speckles> Link for bigger: http://i42.photobucket.com/albums/e341/sinclair97/Cropped300Unsharpmask7.jpg 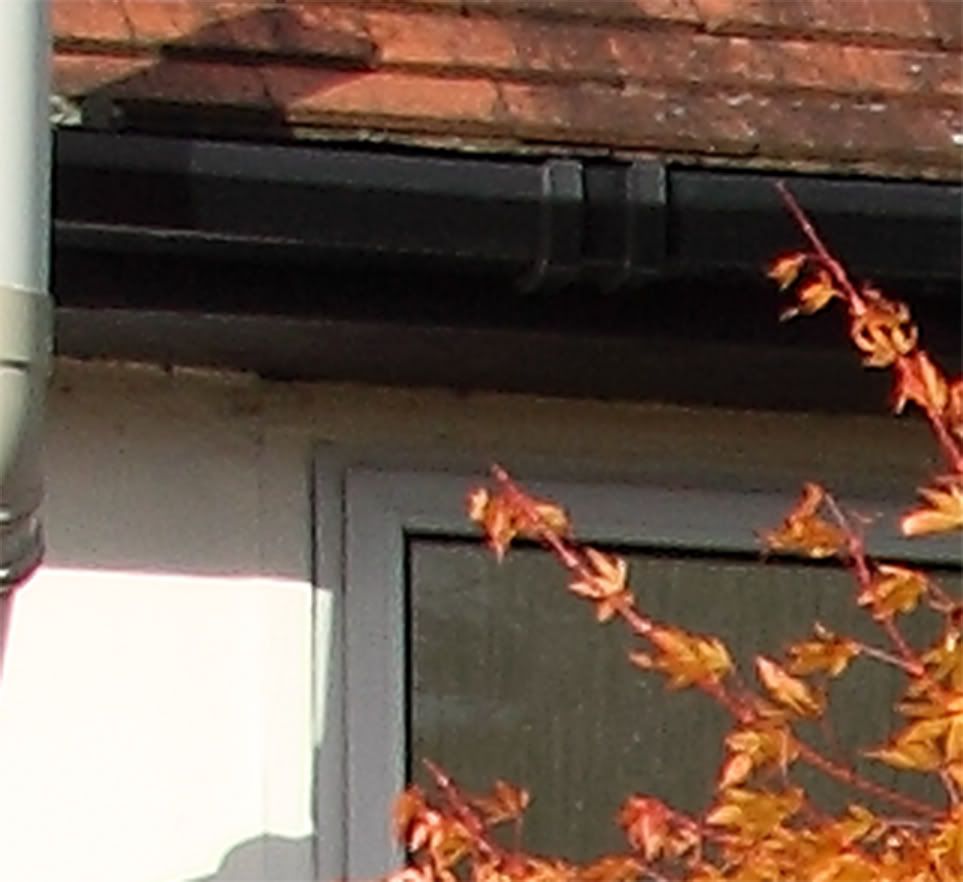
The eighth shot has only the Topaz De-noiser applied. again notice the absence of artifacts and black speckles resulting in a smooth and fairly detailed image. Link for bigger: http://i42.photobucket.com/albums/e341/sinclair97/Cropped300TopazDe-noisermodule8.jpg 
Shot nine illustrates when additional sharpening ( Unsharp mask 50%) is applied only after the topaz De-noiser is applied. Link for bigger: http://i42.photobucket.com/albums/e341/sinclair97/Cropped300Topazde-noiserplusunsharp.jpg 
Don't forget eight of the images have been cropped at 300% (way past usabilty) to illustrate the differences when a Stand-alone de-noiser plugin is used piror to using Photoshop's own destructive sharpening. |