

| » Forum Index » Image doctor » Topic: Suggestions for extracting dog from background |
|
Posted on 06/07/08 01:54:01 AM |
|
k9rescue
* Posts: 3 Reply |
Suggestions for extracting dog from background
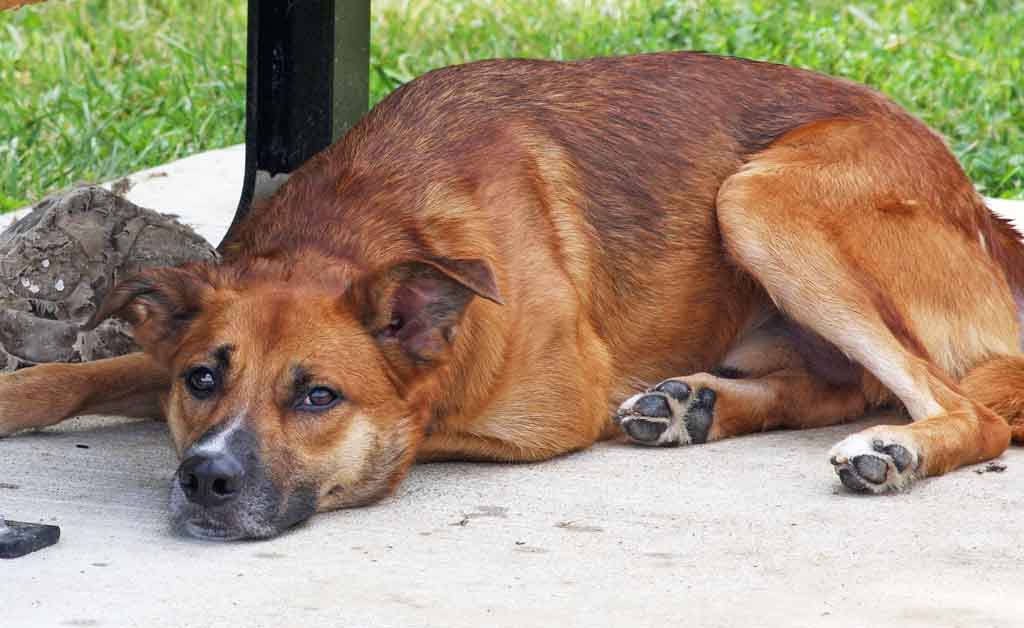
Hi. I've got the CS3- 4th Edition book. It's taught me a lot about how to select/extract/mask objects. Unfortunately, I've got this pic where the background (behind the dog's head) is really close in color to the dog. Any suggestions on what tools to use to most easily extract the dog from its background? Note: I'd just take another photo of the dog, but he's scared of cameras and can sense the focus mechanism so he always turns away (very weird  I finally got one of him hiding under a bench... I finally got one of him hiding under a bench...
 |
Posted on 06/07/08 02:21:26 AM |
|
Taylour
* Posts: 6 Reply |
Re: Suggestions for extracting dog from background
In that case I would probably use the eraser tool for those 'close in colour' areas, and the 'extract' filter for the rest. Or just use the eraser for the whole thing. _________________ Taylour |
Posted on 06/07/08 04:58:21 AM |
|
dave.cox
Marquee Master Posts: 518 Reply  |
Re: Suggestions for extracting dog from background
Your best bet for this type of extraction is probably the pen tool. If you aren't familiar with the pen tool yet, it is well worth the effort to learn. 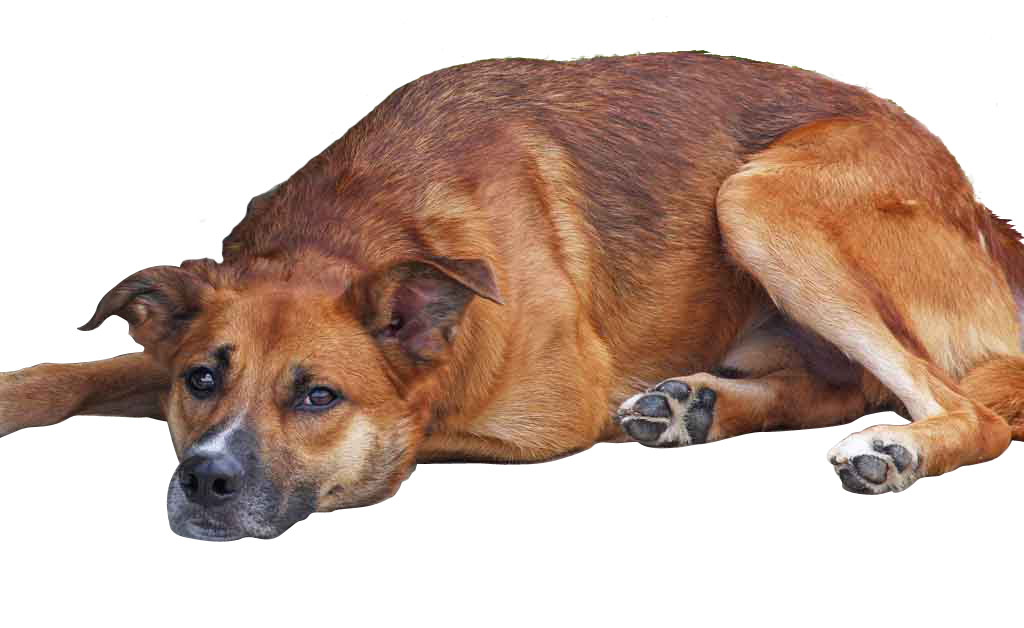 |
Posted on 06/07/08 10:23:33 AM |
|
Nick Curtain
Model Master Posts: 1783 Reply |
Re: Suggestions for extracting dog from background
Hi Animals with fur are very difficult to extract from a background without them looking like a cutout. Dave's advice is sound and the pen is an invaluable tool, but even that is not fine enough to cope with the fineness of the dogs coat. Much will depend on what you want from the image and how much time you can devote to providing realism. Nothing in life seen from a distance has a sharp edge unless you're Superman of course, so an element of feather is necessary. Very often, a small soft brush gives the softness required. I have placed Chance on a very comfortable settee, because I think he deserves it and these are the steps I took. I would stress that this is a very quick attempt and I could have spent considerably more time. Trace around Chance, just inside the body line, with a relatively small soft brush in quick mask mode. Paint inside the original line with a larger brush to cater for the next step. Still in QM use the wand and click anywhere on the dog. This should provide a selection up to the red line. Expand the selection to move just inside the line and fill with black (which will be red) so the whole dog is red. Leave QM and this will return a selection. Place the dog onto a new layer. Using a solid colour fill Adj Layer under the dog layer will allow you to see what job you've made of the cut-out. Remember, you can lose a fair amount of the dog without it being very noticeable so, if need be, load the dog as a selection and add a layer mask. By contracting the selection and adding feather you can paint with black at say 50% opacity and this will soften the edge nicely. Once you are happy with the general appearance, apply the layer mask. Now the fun part. I would suggest using smudge tool at very small diameter to drag outwards from the edge of the animal to simulate fur. Try a strength of say 50% and adjust as appropriate. Remember that fur can grows in different directions Sometimes it's a good idea to also drag in from the transparency. Because the image was low res, I experienced a problem where the back of the dog had a green fringe, i.e. where it had picked up the colour from the grass. Select a brush and pick a colour from the animal. Lock the transparency of the layer and paint out the affected areas. Keep changing colour. This would be less of an issue if you intended to place Chance against grass. Other points to consider. Balance the colour temperature and luminocity of Chance with that of his new surroundings. Shadow is key to making him fit in properly. I hope this helps. Nick 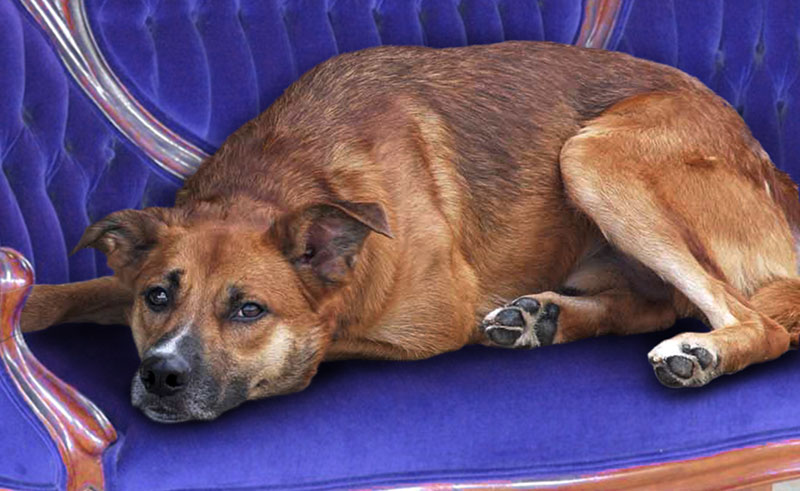 |
Posted on 06/07/08 3:37:22 PM |
|
Babybiker
Shadow Spectaculator Posts: 151 Reply |
Re: Suggestions for extracting dog from background
My first question Nick, was going to be - how did you know the name of K9 Rescue's Dog, when he / she didn't mention it in their post? (But I worked it out eventually!) Perhaps, both Nick & Dave's methods could be combined - giving the advantages of both, and a good excuse to learn how to use the pen tool? Rather than using the Quickmask option (not one of my favourites!) couldn't the Pen Tool be used, the Path converted to a selection, contracted by a couple of pixels, and feathered slightly, then continue with Nick's Smudge etc? Either way - the results are fantastic. (We have visitors, so I can't really devote any time to experimenting with combining the two ideas... much as I want to!) BB |
Posted on 06/07/08 8:03:37 PM |
|
Nick Curtain
Model Master Posts: 1783 Reply |
Re: Suggestions for extracting dog from background
BB You're absolutely right and in fact I must admit to using the pen to select some jagged bits of fur by the dogs tail, while still in QM. The path was converted to a selection and filled with black. I am a real fan of the pen and use it for the majority of selections however, by using the [ ] keys in QM, you can change brush size quickly and make quick uneven edges without having to draw bezier curves. In short, both have equal merits and a combination of both is an ideal solution. I do hope the dog looks like he's actually sitting on the settee. As said, this was done very quickly this morning. Nick |
Posted on 06/07/08 11:20:39 PM |
|
k9rescue
* Posts: 3 Reply |
Re: Suggestions for extracting dog from background
Wow - thanks for all the great ideas! Using some of the suggestions, I was able to select out the dog and change the background. Real examples of Photoshop techniques are probably the best way to learn the tool - well, other than the book, that is  |
Posted on 08/07/08 8:07:01 PM |
|
Nick Curtain
Model Master Posts: 1783 Reply |
Re: Suggestions for extracting dog from background
Glad it was useful, can we see the result? Nick |
Posted on 08/07/08 11:07:05 PM |
|
dave.cox
Marquee Master Posts: 518 Reply  |
Re: Suggestions for extracting dog from background
BB Yes using a combination of selection methods is a good idea. And there is always more than one way to solve any problem. If fact, I only used the pen in my above example to make the selection where there was very little contrast. My preferred method, particularly when there is an irregular surface, such as with hair is to use a channel mask. Not only does it make a better mask, but it is generally faster. This is what I did for the majority of the selection above. If I was going to use this photo, I would probably also draw some of the hair back in using the method outlined in HTCIP. As far as the pen selection being too sharp, you can feather the pen path when you convert it to a selection. If fact, if you right click on the drawing and select convert to selection, you will see that on of the parameters that photoshop needs is how much to feather. You can also feather the selection after it is converted to a selection. Once it is converted to a selection, it is just like any other selection. You can do anything that you can do with any other selection. Dave  |
Posted on 09/07/08 08:19:31 AM |
|
Nick Curtain
Model Master Posts: 1783 Reply |
Re: Suggestions for extracting dog from background
Dave I've used a channel mask to extract from a white background by painting in overlay in black or white to clean the mask, but not sure how you would use this application on the dog. There is very little difference in contrast between the animal and the grass. Are you able to elaborate? Nick |
Posted on 09/07/08 11:40:56 PM |
|
dave.cox
Marquee Master Posts: 518 Reply  |
Re: Suggestions for extracting dog from background
Hi Nick. Sure I can elaborate. If you switch to the channels and cycle through the channels, you will notice that there is a pretty good contrast between the dog and the grass on the green channel. Grab the green channel and drag it to the new channel icon, to create a copy of the green channel. Select the Green copy channel and select Ctrl L to set the levels for this channel. drag the sliders towards the center to better enhance the contrast. Don't worry about destroying the image, as this is only going to be used for a mask. (See the attached example). 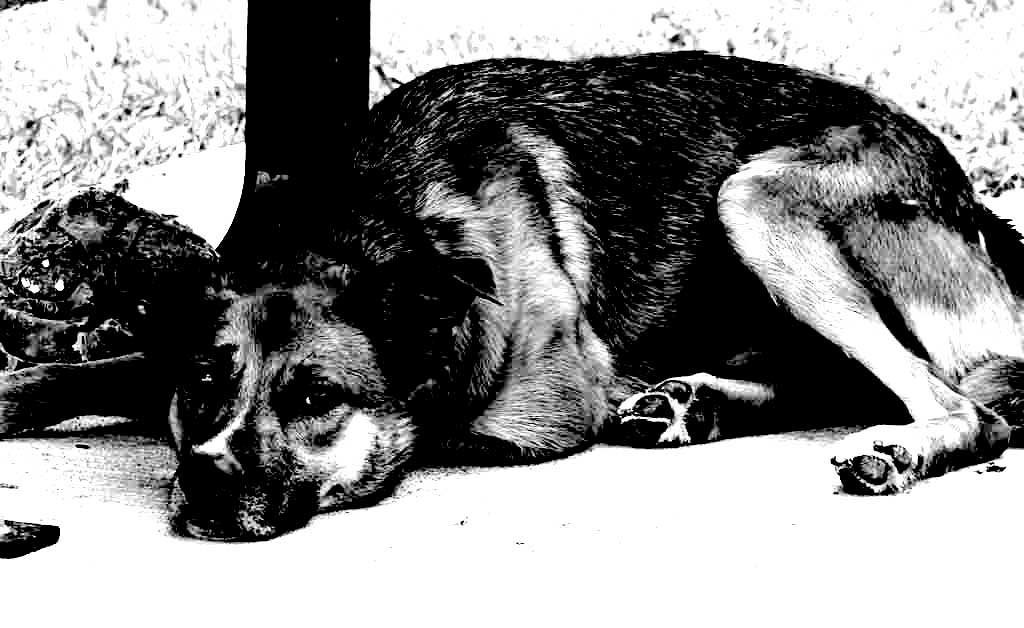
Once you have the mask adjusted, select the burn tool. On the toolbar for the burn tool, set the range to Shadows, and the exposure to about 30%. Now start painting of the edge. You will notice the darker portions getting darker, and fatter. The grass won't be touched. Now select the dodge tool. Set the range to highlight, and the exposure to 30%. Go over the same edge to lighten the grass area. All that you need to worry about is the edge. Once you have a nice contrast, use the lasso tool to select the rest of the dog, and fill with black. Use the lasso again to select the grass and other light areas and fill with white. Control click on the thumbnail in the channels pallet to select the white areas. Of course, Ctrl/Shift/I will invert the selection. |
Posted on 10/07/08 02:17:08 AM |
|
Ellen
Fire Queen Posts: 102 Reply |
Re: Suggestions for extracting dog from background
Dave, That's a clear and concise mini- tut. Thanks for your generosity! |
Posted on 10/07/08 08:06:24 AM |
|
Nick Curtain
Model Master Posts: 1783 Reply |
Re: Suggestions for extracting dog from background
Thanks Dave, that makes sense - appreciated. Nick |
Posted on 20/09/08 04:35:05 AM |
|
R. Halaquist
* Posts: 5 Reply |
Re: Suggestions for extracting dog from background
Not sure if you have tried the Extract filter but it comes in handy. I am sure you have already accomplished the task you were after but for future reference it may come in handy, can be good tool for hair (myself still learning the ins and outs of it though). 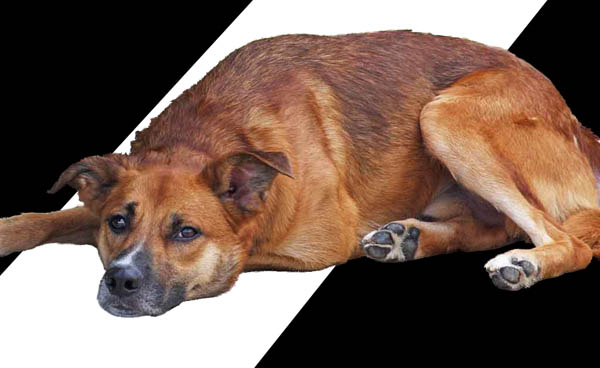 |