
| » Forum Index » The Friday Challenge » Topic: Contest 143: Reach for the Sky |
|
Posted on 27/04/07 8:59:54 PM |
|
Steve Caplin
Administrator Posts: 7135 Reply |
Re: Contest 143: Reach for the Sky
This was a fairly chunky one. All those leaves and flowers! It was a double page spread in the Independent newspaper.  |
Posted on 27/04/07 9:26:07 PM |
|
katew
Virtual Virtuoso Posts: 681 Reply |
Re: Contest 143: Reach for the Sky
Wow! I like! _________________ Wrinkled was not one of the things I wanted to be when I grew up ... |
Posted on 28/04/07 11:20:04 AM |
|
celosia
Wondrous Woolflower Posts: 58 Reply |
Re: Contest 143: Reach for the Sky
Wow, that looks great! Most of my entries I think have had 3 layers! Maybe I need to play about with more layers to really polish my pics. I do love fiddling about with layers and transparency... And 2 comments for the price of one this week! Thanks for the comments, and Gordon, I don't have Pacman so I couldn't screenshot it, and didn't know if it had a high scores table - I was going to use a Solitaire screenshot but not having a high score table the joke wouldn't have worked. |
Posted on 28/04/07 6:39:54 PM |
|
Neal
Master Manipulator Posts: 322 Reply |
Re: Contest 143: Reach for the Sky
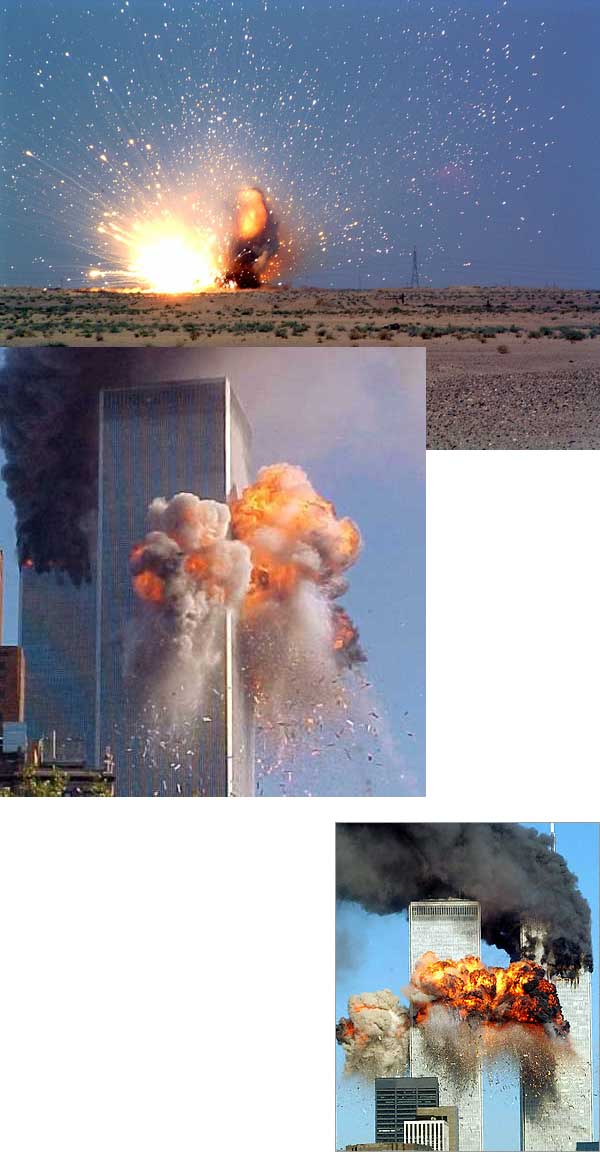
Steve wrote "I'd be interested to know how this explosion was constructed, Neal. What were your source files?" I got the images off the Internet using Google, and overlapped them to look like one explosion. This is great point for me to spill secrets in Photoshop. If I can figure out how to add several images in one message, I'll make a few tutorials. The secret is I work in L*a*b color-space, not RGB or CMYK. If you switch to L*a*b your advanced skills will skyrocket. I overlapped the explosions and used the Blend If properties of the Layers Blending Options. In L*a*b, masks can be created using colors from both the image and the layers under it. In RGB, you can use Blend If and try to isolate colors, but generally, only the Gray is useful. Compare this: Blend If properties in an RGB file are Gray, Red, Green, and Blue; while in L*a*b they're Lightness, a, and b. I can hear everyone now, "What the f*ck are talking about?" The initials L*a*b means nothing, well the "L" could mean Lightness, but this color-space separates the lights and darks from the colors. the "a" channel is two contrasting colors that are similar to red and green, and the "b" is close to blue and yellow. When I placed the explosions over each other, I used the Blend If to mask the blue sky and the gray-brown of the buildings. L*a*b has so many advantages, here's a small list: - You can make colors in L*a*b that can't be made in RGB or CMYK. - Painting a color in a layer with its blend set Color works better. - While not all filters work in L*a*b, the ones that do work better. For example the Shadow/Highlight filter works much better because it only needs to work in the "L" channel. There is no shift in colors. - Color-correcting or matching colors is easy and quick. Matching skin tones is a snap. Removing colorcast is a breeze. - Unsharp Mask works better (you use it on the "L" channel). I could go on, but a demo would explain better than any list. Select a dull image, but any image will do. Convert it to LAB Color by finding the "Convert to Profile.." command. This is found in different places on different versions of Photoshop. CS has under the Image>Mode menu, and CS2 has under the Edit menu. Just don't use the Image>Mode>LAB Color command, this could add artifacts to the image. Make a Curves adjustment layer. Look at the curves for each channel, it's a diagonal. Move the end points closer to the center to steepen the curve. Don't worry about the amount, but move both end points the same distance. Do this for each channel. Right away the image has improved, it's got contrast, and the colors are saturated. Toggle the adjustment layer's visibility to see the difference. Most images are JPEGs and noise and artifacts are everywhere. Blur both the "a" and "b" channels, just enough to kill any noise and remove the rectangular artifacts created by the JPEG compression. Now, sharpen the "L" channel. I guarantee you'll see a big improvement. I'm writing too much, but one last tip. Before you convert back to RGB or CMYK, make a duplicate of the image with the Duplicate Merged Layers checked, then convert.  |
Posted on 28/04/07 8:14:15 PM |
|
GKB
Magical Montagist Posts: 4130 Reply |
Re: Contest 143: Reach for the Sky
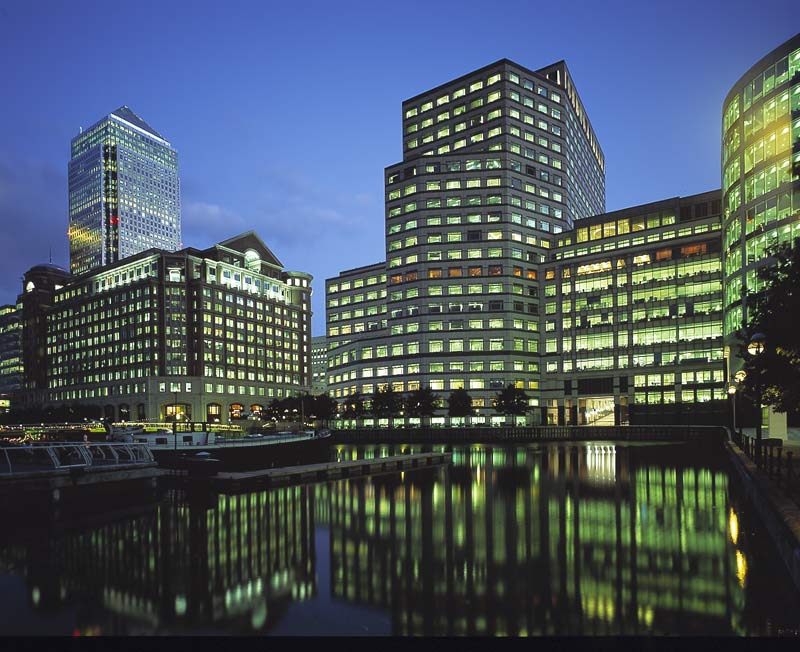
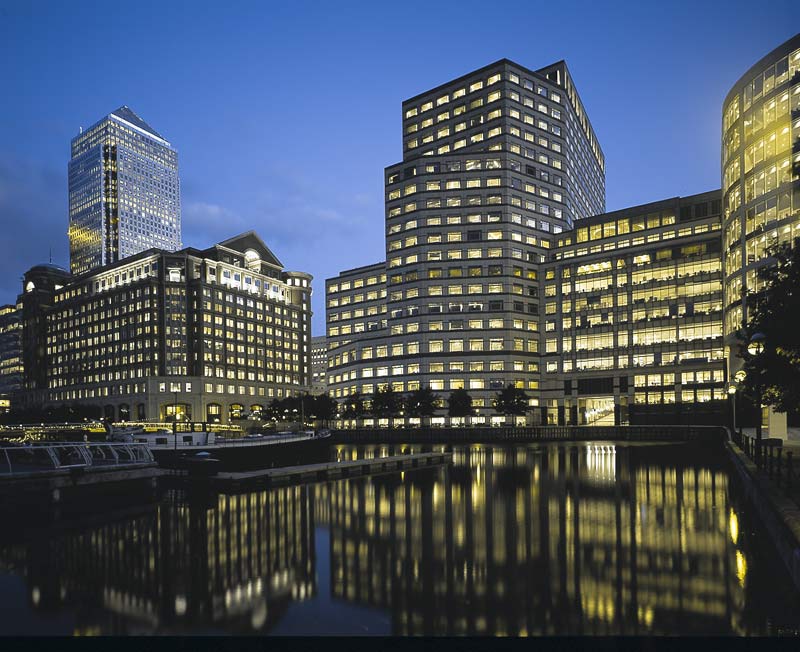
Neal, I agree that Lab is a terrific way of working. I use it almost exclusively for increasing colour saturation, sharpening in the 'L' channel and for some colour correction. It is a really powerful tool but it does demand a totally different way of looking at your images and working with them. I wouldn't even say that I had scratched the surface of Lab yet. I got the 'Photoshop Lab Color' book by Dan Margullis. For the first two or three chapters I was quite happy with what I was reading and seemed to understand what he was talking about. Then, after a while I started to realise that I was just reading his words which had, somehow, changed into a dialect of Swahili used only on Mars! Colour correction is a breeze in Lab. The attached images show some buildings where the fluorescent lights have given an ugly green cast. To remove this in Photoshop would have taken forever with all sorts of impossible masking in RGB. With Lab it was done in 30 seconds. With a bit more work I would probably have gotten rid of the other casts but I liked this version so didn't bother. I'm looking forward to your tutorial. 
|
Posted on 28/04/07 8:14:57 PM |
|
GKB
Magical Montagist Posts: 4130 Reply |
Re: Contest 143: Reach for the Sky
 |
Posted on 29/04/07 01:41:53 AM |
|
Neal
Master Manipulator Posts: 322 Reply |
Re: Contest 143: Reach for the Sky
I'm with you Gordon, I bought Dan Margullis' book, and I get lost in it, too. Nice job on color-correcting the cityscape! |
Posted on 29/04/07 02:01:58 AM |
|
dirtdoctor23
Guest Reply |
Re: Contest 143: Reach for the Sky
I can see why you are the tutor and we are the students, Mr. Caplin. Brilliant work!! _________________ "I haven't failed.... I've found 10,000 ways that don't work!" Thomas Edison |
Posted on 29/04/07 08:34:06 AM |
|
hi-liter
Pastiche Painter Posts: 108 Reply |
Re: Contest 143: Reach for the Sky
Steve, Gordon and Wayne, thank you all! Sorry it's taken so long to reply... I was having the hardest time being able to get to the forum... getting error messages (page wouldn't load). Anyway, really appreciate the comments and the title (have to look the word up!  ) See all that one learns here? Amazing! ) See all that one learns here? Amazing! 
_________________ Drawing attention to what otherwise might be overlooked... emphasizing things that matter. |
Posted on 30/04/07 6:55:30 PM |
|
Steve Caplin
Administrator Posts: 7135 Reply |
Re: Contest 143: Reach for the Sky
Fascinating stuff, Neal. I agree, Lab is a very interesting colour space. I've never covered it because... well, it's just so damn hard to explain what it's all about. But you're right, it certainly repays close examination! |
| page: 1 2 3 4 last |