
| » Forum Index » Reader's Tutorials » Topic: Adding image borders |
|
Posted on 26/03/06 3:24:23 PM |
|
trinityofone
Guest Reply |
Adding image borders
Just a quick one to visually demonstrate adding a border to an image. 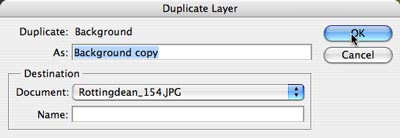
1. Open the image. Select Layer>Duplicate. You can rename it but here, the defaults have been used. 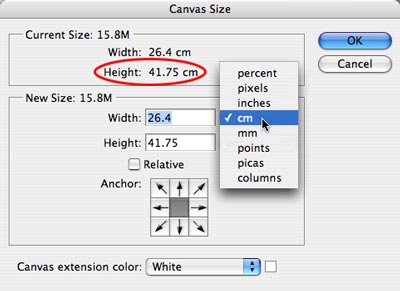
2. Go to Image>Canvas Size. The current width and height are displayed at the top of the dialog. We're only interested in the height for this example. The default measurement type can be changed to suit. In this instance, we've chosen centimetres from the drop-down menu. 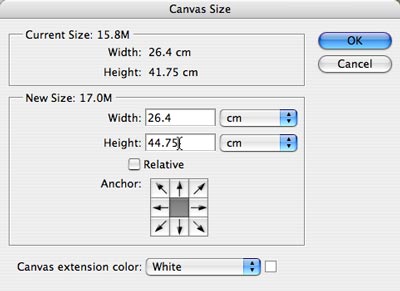
3. Type the new height into the box. In this instance, an extra 3cm has been added. We haven't used the Relative box. If this was checked, we would just need to enter 3cm. 
4. We need to specify where the extra space will be added. For this example, it's the bottom of the image so click the top-middle anchor marker. 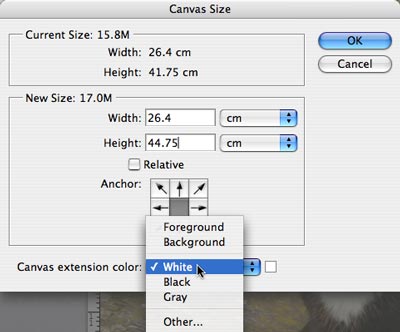
5. In Photoshop CS and CS2, the canvas extension colour can be specified from the menu at the bottom of the dialog. Previous versions use the current background colour. 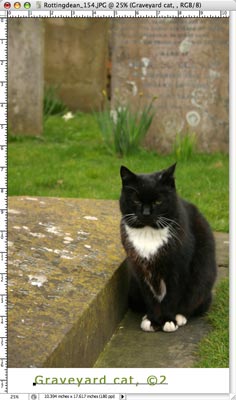
6. Select the Type tool. Click on the newly created blank area. This will add a new layer for the text. 
This method can also be used to add a complete frame to the image. Increase both the width and height and keep the middle anchor point selected. _________________ It must be Thursday, I never could get the hang of Thursdays |
Posted on 26/03/06 8:12:19 PM |
|
Lexus
Persistent Pixellator Posts: 623 Reply  |
Re: Adding image borders
Great Tut... I should start making some more... _________________ 3 Radio Visit http://www.3-radio.co.uk and listen! You will love it! |