
| » Forum Index » 100% Photoshop » Topic: Setting the Scene - The Wall Behind |
|
Posted on 26/04/11 10:22:12 PM |
|
greywidget
* Posts: 13 Reply |
Setting the Scene - The Wall Behind
Hi there, I wonder if someone might be able to clarify something for me please. Im a little confused by Setting the Scene Step 7 ( The wall behind ). I'm not sure what I should be applying the Cloud Filter and Gaussian Noise/Blur to. If I understood correctly, in Step 6 ( the same as Step 5 ) we created a new layer using the Wallpaper Layer as a clipping Mask. This means that we can only draw over the reddish embossed wallpaper part - not the white corner that we want to give the wall colour to. It seems to me that I need to create an inverse of the previous clipping mask for the wall behind. Also although I'm using the default shortcut keys, Ctrl+Alt+G didn't seem to work for me (Photoshop CS (version eight)), I had to create a new layer than drag the wallpaper layer using Alt to my new layer to create the clipping Mask, I hope that was correct. Please see attached - any advice gratefully accepted. Craig PS sorry the door is a bit lame, I intend to redo it, but I just wanted to work through some other stuff for a change first. 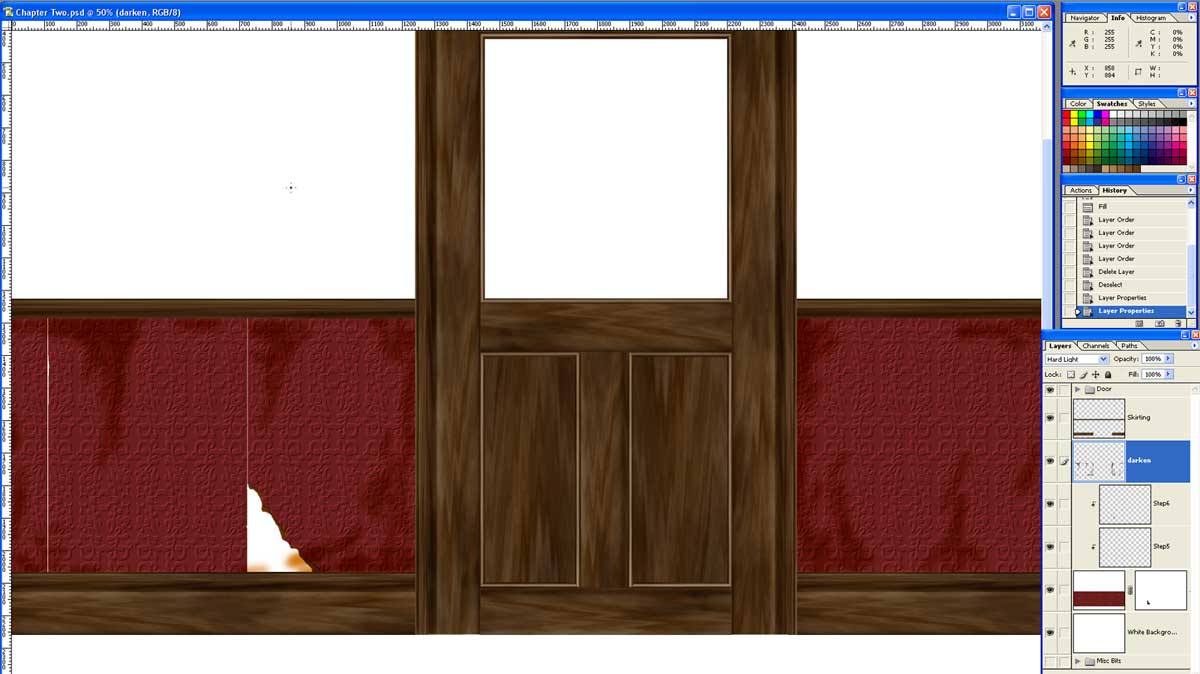
|
Posted on 27/04/11 08:02:04 AM |
|
stevecaplin
Administrator Posts: 7 Reply |
Re: Setting the Scene - The Wall Behind
You can apply the filter directly to the background layer, if you like - or it's easy enough to make a new layer behind everything else in which to make the wall as seen through the hole. This can be as simple as a rectangular shape behind the hole - no need to make it even approximately the same shape. Sorry, I should perhaps have specified this in step 7. In step 6, that's right - the new layer only shows up where it overlaps the wallpaper, not the wall behind. That's because we're creating the effect of torn wallpaper, and this is the torn portion. You're probably right about the Clipping Mask issue with Photoshop CS. It's possible those keys weren't assigned to it then. But look under the Layer menu, and you should see Make Clipping Mask listed there - or, possibly, Group Layers. I can't remember when they changed the terminology. |
Posted on 27/04/11 10:34:08 AM |
|
joeysala
Perfect Palmist Posts: 604 Reply |
Re: Setting the Scene - The Wall Behind
Hi Greywidget - regarding your comment on the door: I bet once you do the hardware and window you're gonna like it just fine! Looks pretty good to me! Joey |
Posted on 27/04/11 10:20:09 PM |
|
greywidget
* Posts: 13 Reply |
Re: Setting the Scene - The Wall Behind
Hi Steve, I get you, thanks. I appreciate the help and the quick reply. You'll be pleased to know I've been trying to spread the word about your great book and have managed to get a couple of my friends to buy it too! Joey - thanks for your kind words. I know the door is recognisable as a door at least but there are a few quite bad mistakes, I do intend to sort them out at some point. Having been through the process once, I'm sure I can improve most of it, the only thing I'm not sure about is going for the mahogany look. I spent quite a while originally trying for mahogany but I couldnt get the tight pattern or the color right. Still, it's nice to have some challenges! Craig |