
| » Forum Index » Announcements » Topic: New tutorial on Creative Pro |
|
Posted on 15/02/13 5:53:51 PM |
|
Steve Caplin
Administrator Posts: 7161 Reply |
New tutorial on Creative Pro
My latest Creative Pro tutorial has just gone live - it's on creating a 3D bracelet in Photoshop: http://www.creativepro.com/article/modeling-3d-bracelet-photoshop I'd be particularly pleased if you could take a look and, if you like it, give it a rating. The bracelet is an invention I came up with that Ive just submitted to the inventors' website Quirky - so do vote for the idea there if you're able to (and if you think it's a good idea): http://www.quirky.com/ideations/402714 Thanks! Steve |
Posted on 16/02/13 02:15:41 AM |
|
Artwel
Satire Supremo Posts: 607 Reply |
Re: New tutorial on Creative Pro
That's a great idea and design Steve! And the more I look at it the more I can't think of a reason why it shouldn't work. There's a lot of talk lately about a possible Apple iWatch/ bracelet in the works, which could set the trend in the wearable computer market. Another company has just launched the PebbleWatch. http://getpebble.com/ It already looks dated and reminds me of the Dick Tracy watch! Like you point out in your description, it's good to have a minimal, simple design. I can just see Apple having a product like yours, maybe in brushed Aluminium, and with a Siri type voice interface, Along with some Google Augmented Reality eye patch type thing. I guess we'l find out over the next couple of years..  _________________ "If we don't succeed, we run the risk of failure" |
Posted on 17/02/13 3:17:56 PM |
|
Mariner
Renaissance Mariner Posts: 3311 Reply |
Re: New tutorial on Creative Pro
A very good sales idea, Steve, and I am certain it could be made to work. Perhaps in the Mark II version you could give the ladies a choice of colours and patterns. |
Posted on 17/02/13 3:49:53 PM |
|
Sjef
Flying Dutchman Posts: 571 Reply |
Re: New tutorial on Creative Pro

This is not only a great idea, but the way to draw it within the CS6 - 3D engine is quite a beautiful peace of work. Thans for the tutorial Steve, I'll try to build my own bracelet. |
Posted on 17/02/13 5:15:34 PM |
|
Frank
Eager Beaver Posts: 1859 Reply |
Re: New tutorial on Creative Pro
Great idea Steve -I think it would fly well with the ladies and become a popular item. No ideas on the techie side of it. I did your tut and found it a little difficult due my inexperience with the path tools. I found in order to complete the tut one had better not be a beginner with either paths or 3D. I didn't save my path so had to redo for the microphone piece. I noticed when you went for reflections in the bracelet you did not increase the reflections or the shine in the bracelet component materials? (just increased environment for the ground reflection) Also noticed you left the hinge and microphone with basic grey material. Also noticed an error in the thumb on the girl both above and below the bracelet (masking). Oh well there goes any kudos for future Friday challenges. Nevertheless here's my go at it. I certainly got good practice in positioning 3d objects and learned a few things. Thanks 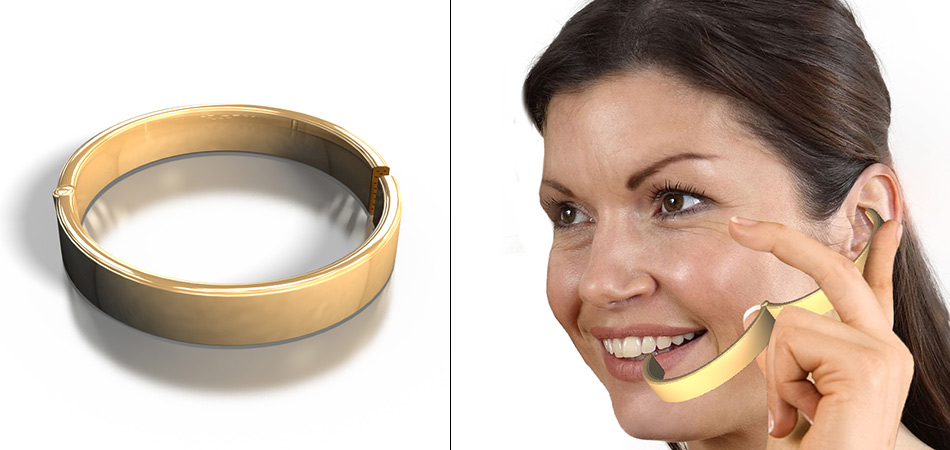 |
Posted on 17/02/13 10:57:49 PM |
|
ConnieR.
* Posts: 53 Reply |
Re: New tutorial on Creative Pro
Wonderful idea! And a great job modelling it in Photoshop too. |
Posted on 18/02/13 07:14:59 AM |
|
Steve Caplin
Administrator Posts: 7161 Reply |
Re: New tutorial on Creative Pro
That's really well achieved, Frank! But you didn't need to "lose" your original path. If you select the bracelet, in the Properties panel you can find the Edit Source button - this will open the path in a new window, so you can copy it and paste it on a new layer to make the microphone. Yes, I left the hinge and microphone in their original grey texture. They need to be made out of plastic, after all, and not of gold-plated metal like the rest of the bracelet. And you're absolutely right about the error with the thumb - looks like the hand has slipped up a few pixels. Well spotted! |
Posted on 21/02/13 6:39:55 PM |
|
Deborah Morley
Makeover Magician Posts: 1319 Reply |
Re: New tutorial on Creative Pro
A good tutorial Steve. Rather embarrassed to say although I use the pen tool a lot to select stuff, I have never/copied/flipped etc. Have always made the path into a selection and then duplicated etc. But now I can use the path. Something new learnt today. Now to finish the tutorial! |
Posted on 24/02/13 6:59:33 PM |
|
Emil
KAFKAsFRIEND Posts: 413 Reply |
Re: New tutorial on Creative Pro
Great tutorial Steve!!! I nearly gave up it. Especially when the microphone did not fit to the modelled shape of original path (it is the reason why I hid the sides :-)) The hardest thing was to fit the bracelet on the ground (still it is not perfect). And the rendering time was about two and half hours. 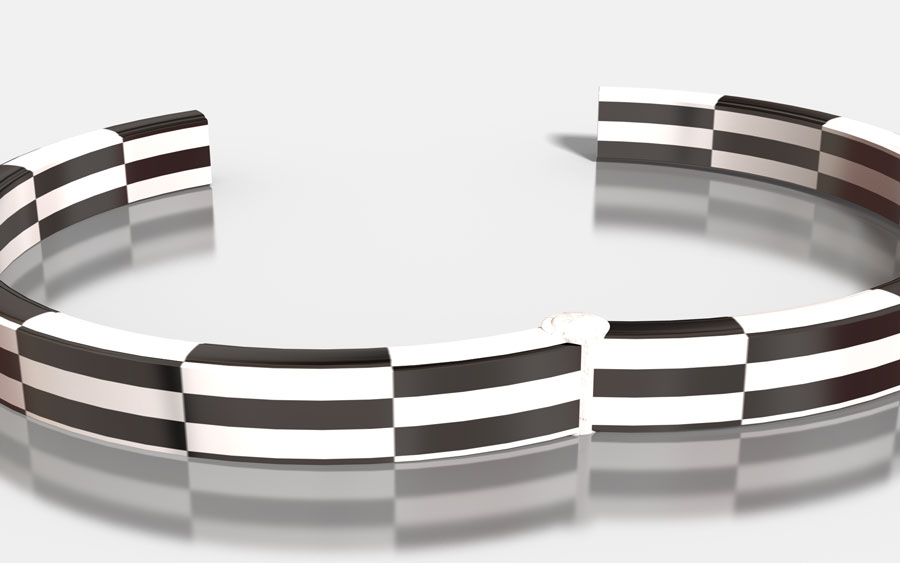
_________________ For me the creative process is more one of discovery than creation. - James Lee Burke |
Posted on 25/02/13 07:26:47 AM |
|
Steve Caplin
Administrator Posts: 7161 Reply |
Re: New tutorial on Creative Pro
That looks excellent, Emil. Fitting the bracelet onto the ground is easy if you follow one simple rule: never move it off the ground in the first place. If you want to view it from different angles, make sure it isn't selected. Then, when you use the Rotate tool, it will rotate the view, not the object. Two and a half hours to render? That seems like far too long! Mine took about 15 minutes. But then perhaps I didn't wait for it to stop rendering completely. It's one of the clever things about Photoshop, that you can just stop the render whenever you like. I stopped mine when it looked good enough. |
Posted on 25/02/13 2:05:55 PM |
|
Sjef
Flying Dutchman Posts: 571 Reply |
Re: New tutorial on Creative Pro
Esc-key = stop rendering |
Posted on 26/02/13 06:06:57 AM |
|
Sjef
Flying Dutchman Posts: 571 Reply |
Re: New tutorial on Creative Pro
Hi Steve, A very great item to learn to handle the 3D-tools in CS6!! I followed your tutorial to construct this bracelet and had (almost) no trouble to complete it. But the microphone (B) was another story. When I extruded the path (C is to make it more clear) you can see the result: no circles. I kept trying, but I really don't know how to go further  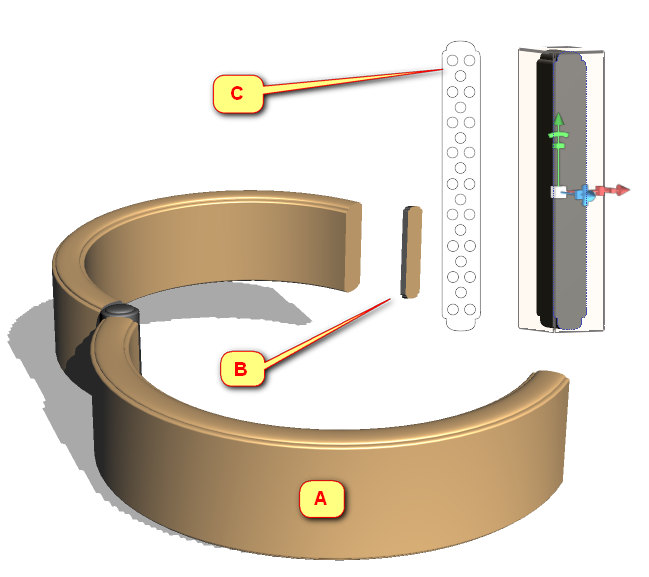 |
Posted on 26/02/13 08:32:26 AM |
|
Steve Caplin
Administrator Posts: 7161 Reply |
Re: New tutorial on Creative Pro
This often happens with paths, and it's down to whether new paths are set to add, intersect, or subtract from old ones. Select your microphone as a 3D object, then from the Properties panel choose Edit Source. Select all the paths, and choose the following option: 
When you save the source document, you should find the microphone now has holes in it. |
Posted on 26/02/13 10:31:38 AM |
|
Sjef
Flying Dutchman Posts: 571 Reply |
Re: New tutorial on Creative Pro
That's it Steve!! Thanks for your super quick answer. This option was checked but indeed, I got the holes AFTER saving the .PSB file |
Posted on 26/02/13 12:44:16 PM |
|
Sjef
Flying Dutchman Posts: 571 Reply |
Re: New tutorial on Creative Pro
Once the option Environment»IBL was checked, I couldn't get it unchecked anymore. I chose a template color Purple Faze, which I find it's looking like anodized aluminium (the cheaper version at the shops) 
To much fiddling with shadow after which I couldn't get a good result. Must utilize your answer to Emil about the base ground. Couldn't find the option to skew the microphone. And there's a diagonal line on the back halve. Didn't disappear with rendering. Couldn't apply a different color for the hinge after applying the template color. Must do the whole tutorial again (and again if necessary). Of course the examples in your CS6-book can be of help too. But especially this tutorial is very instructive! Thanks again Steve and I keep trying. 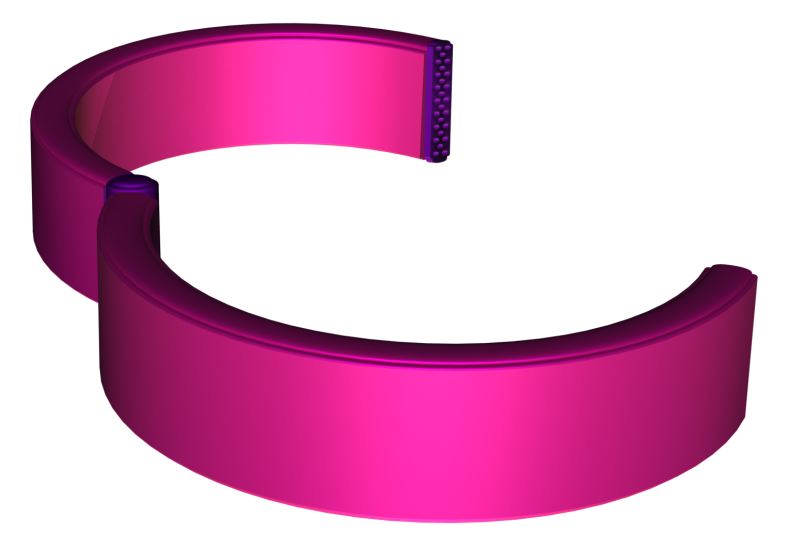
|
Posted on 01/03/13 8:51:08 PM |
|
Frank
Eager Beaver Posts: 1859 Reply |
Re: New tutorial on Creative Pro
Sjef, Like your bracelet -- nice job --I'm sure that would be a popular color. A couple of 3d points I've found : If you get off ground plane and object(s) all skewed up go back to default camera and after clicking that then select each object 's" layer" and set all "rotations" to 0 degrees. Snap object to ground plane after that . Unfortunately PS does not have snap object to object below so using green arrow draw object up say above a table you wish to place it on. Just get it above the table and watching your secondary view (Right) use the co-ordinates "Y' and tap your down arrow key to slowly lower down. As for the Diagonal line you mentioned (which also shows up in Steve's tut} the reason for this I discovered is that the perpendicular line in the originating path is not perpendicular but off say 1/2 or greater degrees. Hence when the object is extruded 360 the two back halves do not entirely close flush leaving a gap in this area.(a line) Pays to use a guide or grid for this path line. I also read but can't confirm if we are rotating(extruding) like this and just using the extrusion material only: reduce the opacity of all other bevels ,front inflation ,etc to 0 so nothing bleeds thru . I'll let it go at that for now. Cheers |
Posted on 03/03/13 12:22:40 PM |
|
Sjef
Flying Dutchman Posts: 571 Reply |
Re: New tutorial on Creative Pro
Thanks a lot Frank for your remark. I'll read your comment again as soon as I've got the time to do the tutor again so I can experience this perpendicular line when extruding 360 degrees. And thanks for your tip about using a (snapping) grid for this path line. |
Posted on 06/03/13 2:02:01 PM |
|
Sjef
Flying Dutchman Posts: 571 Reply |
Re: New tutorial on Creative Pro
I give up. 3D in Photoshop is to complicated for me. I keep searching and searching for the right options behind all the little icons and I don't get the same result as shown in the tutor while I follow all the steps exactly as descriped. Deformation in Mash, Deformation in Deform, Reset deformation in Cap and lots of times searching for the Material-pallet which doesn't work the way one would expected. I watched your movie Steve, about a horizontal wine label which had to be edited vertically at random and I said to myself, this is not the way it should be. In Holland we say: shoemaker, stick to your last. When I want 3D I'll use 3D software. 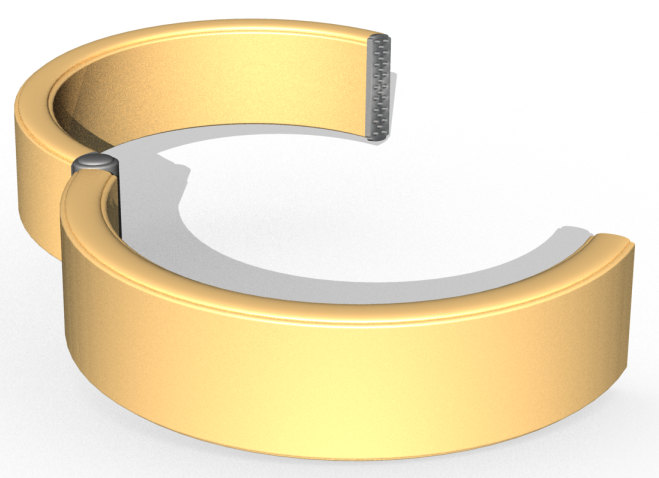 |
Posted on 06/03/13 2:02:24 PM |
|
Sjef
Flying Dutchman Posts: 571 Reply |
Re: New tutorial on Creative Pro
 |
Posted on 07/03/13 08:29:15 AM |
|
Steve Caplin
Administrator Posts: 7161 Reply |
Re: New tutorial on Creative Pro
Sjef, I understand your frustration here. At the same time, I can't see what you're doing wrong. With that wine bottle example especially, what I'm seeing here really doesn't make sense to me. Are you saving the psb file each time you move the object? If not, can you send me the Photoshop file so I can see what's happening? Steve |